Saturday, August 6, 2016
Free Boost Mobile Reload Codes
Free Boost Mobile Reload Codes: Free Boost Mobile reload card codes are here! Visit this website and learn how you can add free minutes to your Boost Mobile phone! Guaranteed!
Saturday, August 25, 2012
T-Shirt Art and Home-Made Paint
My mama use to make shirts for me all the time when I was growing up! Sometimes she would let me help and I would make some really cool stuff!! It's time to pass on the memory! I've even found a couple fun and easy recipes for homemade fabric paint so you don't have to spend alot of $money$ to make some great fashion! The recipes are posted at the bottom
What are you waiting on? Lets Get Started!!
Lets turn a plain T-shirt into your own simple work of art.
(You don't have to use a T-shirt, you can use any type of fabric you like. For example-> hats, pants, jackets, white shoes, shoe strings etc.)
This would also be a great idea for a project done at a Craft or Art themed Party! You can get plain shirts cheap at thrift stores or even The Dollar Store and the paint recipes below are very cheap!

First off ~~>
You will need~~>
- A plain T-shirt or sweatshirt
- Pencil
- Cardboard
- Clothespins or large paper clips
- Fabric paint or Home-made Paint (Recipes at bottom)
May we began.....
- Place the cardboard inside the T-shirt and Clip it in place with the clothespins or paper clips
- With your pencil, draw a picture on the shirt
- Use the fabric paint to add color to your drawing. You can simply paint over the outline or/and color it in.

If you would like, you can make a design instead of a picture.
For example, you can use shapes and lines in different colors to make a fun, modern pattern.
DIY Puffy Fabric Paint
- Take regular white Elmer's School Glue and put small amounts into bottles.
- Take different colored Kool-Aid packets and mix the powder with the glue.
- Make sure the colors are mixed up really good.
- Paint your design on fabric and let dry.
| Home Made Crayon Fabric Paint | ||
| ||
Wednesday, August 22, 2012
A Road in a Pocket
It's pretty much a Carry-Along Toy Road in a Pocket!
This
is a simple toy that can be taken along on to friends houses, trips,
etc. It's also very easy to make, boys are more likely to love it but
girls will like it also!!!

1.
Cut out road patterns to use on the fabric. (I made the roads about 2
1/2 inches wide but you can go smaller or larger. It's the perfect size
for 2 cars side by side.)

2. Cut off 1 leg of a pair of jeans. (I got 6 road peices out of one leg)

3. Lay out the patterns on the fabric, try and cut the pieces as close together as you can so you can get more out of the space.

4. Trace the patterns onto the fabric, I use a regular pencil but you can use a fabric pencil if you have one.

5. Lay out our pieces to see if you have a cool road (This step is not necessary, but you know you want to!) (I did this to see if I needed an extra road pieces)

6. Paint on the Lines down the middle of the roads (I used Yellow Acrylic Paint)


7.
While the paint is drying, Cut a pocket out of the same jeans. (This is
going to be for storing the road when it's not being played with, It's
also what makes it so great for travel!)

8. If you like, You can paint the yellow lines on the pocket to match it to the roads.

9. After the paint dries, you can fold up the road pieces and fit them inside the pocket!
Just
add a few cars then you and your kiddos are ready for a day with no
boredom!The road pieces can be put in all different road formations!
Your kids will have fun making different roads, you can also make
buildings with left over jeans if you like (I didn't this time, but I
may in the near future.)

I got this idea off of pinterest.com and had to make one for my friends little boy! I hope you enjoyed the walk through steps. Enjoy!!!!
Post by Autumn with Thru My Eyes Creations and Thru My Eyes Photography
Wednesday, July 18, 2012
DIY Shrug Shirt
I found this DIY Shrug Shirt online and I'm so excited about getting some old T-Shirts and making these for me and both my little girls!!! I'll post pictures as soon as I make one!! If you make one PLZ post pictures so I can see them!! :0)
 1. Grab a Shirt
 2. Cut along the dotted line and cut off neck band.
 3. Turn shirt inside out and fold in 1 inch to form the casing
 4. Pin and Sew
 .5. Pull the ribbon through the casing using a safety pin. Pull tight and tie.
1. Grab a Shirt2. Cut along the dotted line and cut off neck band.3. Turn shirt inside out and fold in 1 inch to form the casing4. Pin and Sew.5. Pull the ribbon through the casing using a safety pin. Pull tight and tie.Saturday, July 7, 2012
Mini Lightning Bug Jars
Outside Summer Fun
Whats
more fun than running around outside on a summer night chasing
lightning bugs?? Catching them and putting them in jars for safe
keeping! Most of the time you would use one of the gallon mason jars... I
have a new idea for you. How about Mini Lightning Bug Jars? Easy to
hold in small hands and not likely to be dropped when running thru the
yard. You can make them with as little as 2 to 4 (depending on if you want to decorate your jar or leave it clear) things that could be laying around your house right now!!! These can be made by the child, with your help with the knife, or
you can make them for your kids yourself. The choice is yours!!!!!!


All you need is :
- Baby Food Jars
- Knife (Adult help/supervision is needed for putting the holes in the lid with knife.)
- Permanent Markers *I used black and orange for stars and fireflies*(optional)
- Stickers (optional)
Instructions :
Step 1 --> Make sure the jars are clean and dry.
Step 2 --> Get an adult to poke holes in the top of the lid so the lightening bugs can breath.


 Step 3 --> Write your name on your jar if you would like and decorate with stickers or draw fireflies with black and orange markers.


**If you would like then your jar is finished. Or you can go on to Step 3**

 Step 3 --> Write your name on your jar if you would like and decorate with stickers or draw fireflies with black and orange markers.
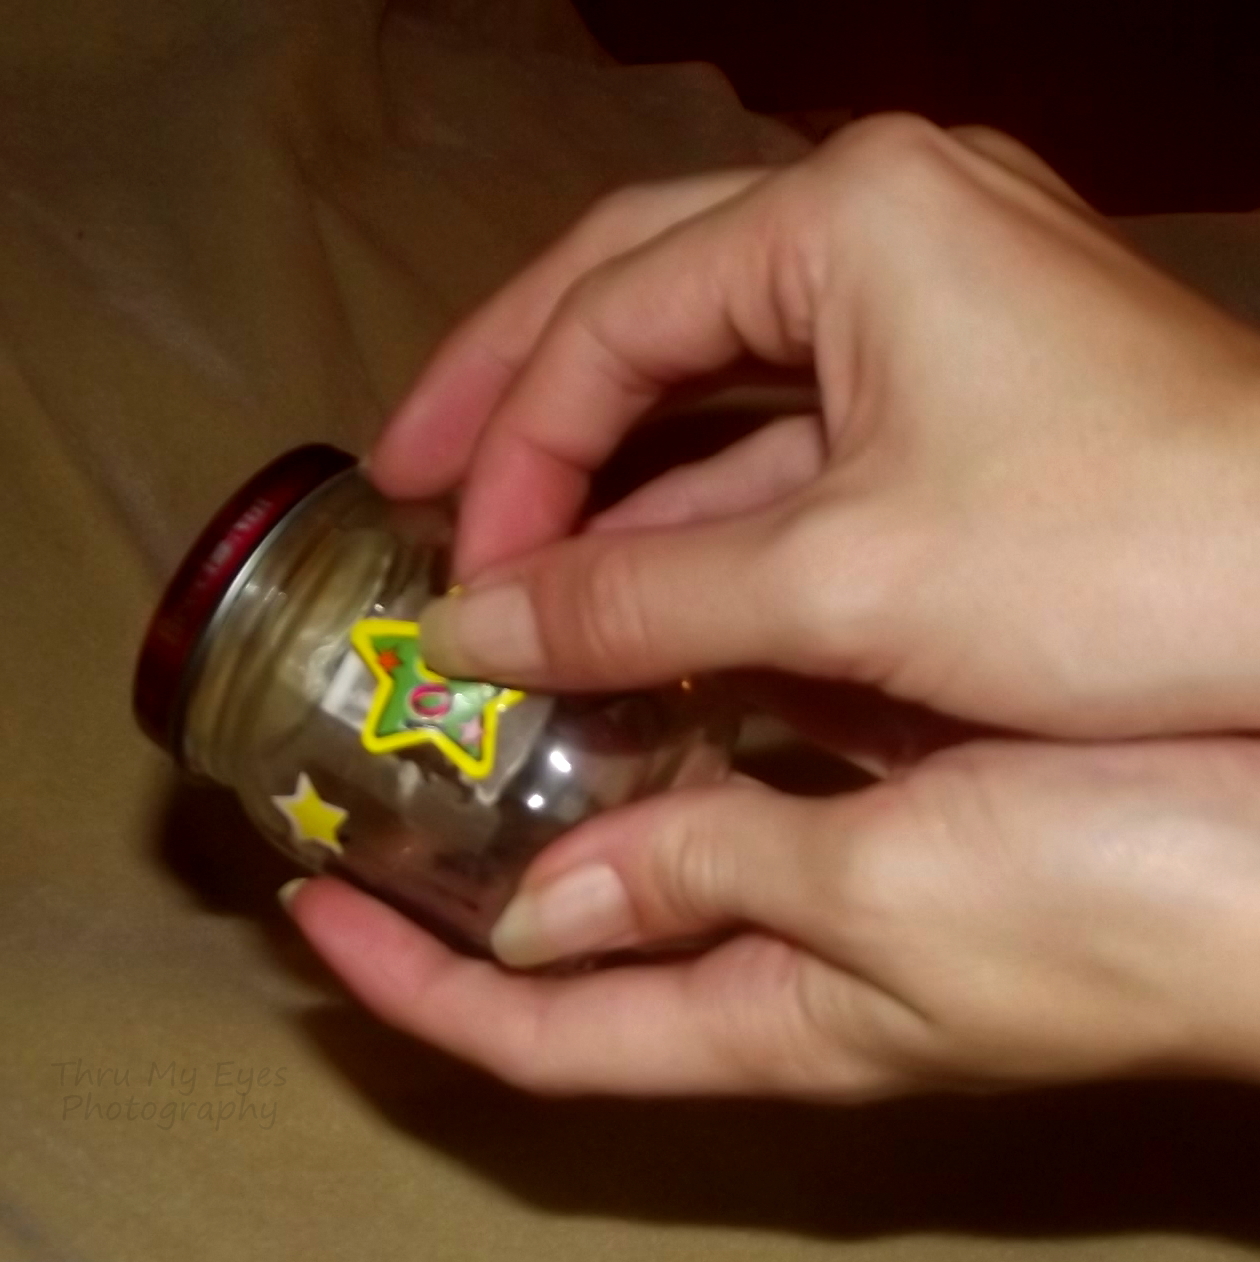
**Our Finished Lightning Bug Jars!!!!**


Friday, July 6, 2012
Rainy Day ~ Magnetic Fishing Game

Magnetic Fishing Game
Provide your kids with interactive amusement by constructing this magnetic fishing game with a few simple materials.
Make It: Help your
child paint a square wooden dowel and wooden spool his favorite colors
and allow to dry. Glue white string around the spool and adhere it near
the bottom of the dowel. Attach a long string to the far end of the
dowel and tie a magnet to the opposite end (magnetic barrels from the
jewelry section of the craft store work well). Make clothespin "fish" by
painting them fun colors with pink lips. Let paint dry and help your
child glue on sequin scales and googly eyes. Now he'll be ready to go
fishing!
Craft found at Parents.com
Subscribe to:
Posts (Atom)